A Practical Guide To Containerize Your Rust Application With Docker

on [Unsplash](https://unsplash.com/photos/meteor-rain-XjQoe6YXiDU?utm_content=creditCopyText&utm_medium=referral&utm_source=unsplash)](/assets/images/unsplash/tomas-yates-XjQoe6YXiDU-unsplash.jpg)
Photo by Tomas Yates on Unsplash
If you have Rust code that you want to deploy as a Docker container, this guide will help you to write your first Dockerfile and build and run your Rust application.
This blog post is a copy of my original article on containerizing C++ applications. This copy focuses on how to achieve the same, just with Rust applications. If you have a Rust application and want to get started deploying your application via container, this article is for you.
Today’s Example: iowa
For this exercise I have reused an older Rust application example by me, a simple key-value-store written in Rust. If you want to read more about the application, you can find the article here and the corresponding code in the repository. This application exposes a HTTP port for setting and getting values, so it is a fairly straight-forward project to put into a Docker container.
The Quickest Docker Introduction
If you do not know Docker yet, let me quickly introduce you to the most important concepts. The most important thing to remember is: Docker is not a virtual machine. Docker is a mechanism to containerize applications and isolate the processes running these applications.
Virtual machines are about isolating hardware, Docker is about isolating processes.
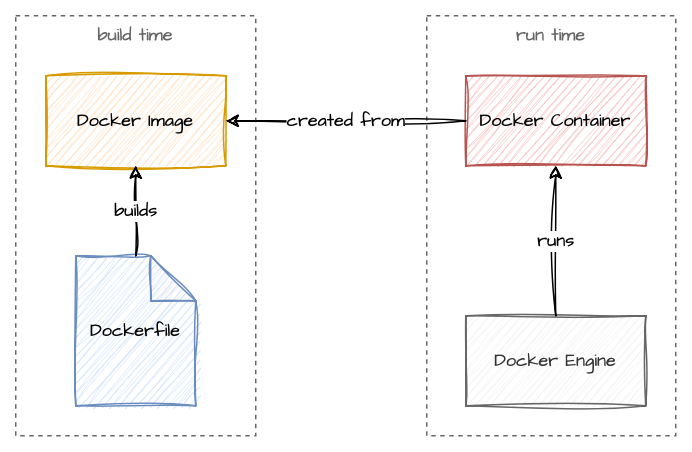
There are two central entities in the Docker world: images and container. A Docker Image is created from a so called Dockerfile. This file describes the commands to build an image. From this image a Docker Container can be created: they are the actual running instances of the images. The Docker engine is responsible for instantiating and running the containers.

There are additional concepts that are not important for our example in this blog post. However, I want to mention them in case you want to investigate further.
- Docker Volume is a mechanism to have a Docker managed file share between your container. You can map these volumes via so-called bind mounts into a container.
- Docker Networking allows you to specify virtual Docker networks. Network traffic from and to containers is routed through a Docker proxy. This allows different setups for networking between individual containers.
- Docker Compose is a feature to build and run several different containers from a single
docker-compose.ymlfile. You can specify the exact images for the docker containers, the container names, networks, volumes and much more. For example, if you want to run a MySQL container and your custom REST API service container along with a REDIS container for cache, you can set this up with Docker compose.
Installing The Docker Engine
Before you get started, you need to install Docker. The Docker website recommends the usage of Docker desktop but it is not required to run our example. I prefer the command line to GUI applications when it comes to building, running and everything else about Docker containers.
However, on MacOS I found it easier to just install Docker Desktop for the engine. If you still want to just install the engine without the desktop application, follow these excellent tutorials for MacOS or Windows with WSL.
The following command installs the Docker engine on Linux distros with apt as package manager:
sudo apt-get install docker-ce docker-ce-cli containerd.io docker-compose-plugin
Find more informations about installing the Docker engine on the official documentation including adding the correct repository and troubleshooting.
Writing The Dockerfile
The initial project structure is a simple Rust project with a single source code main.rs file and a Cargo.toml file.
The main.rs file is responsible for starting the application, launching a web server and exposing endpoints for
setting and getting values. The Cargo.toml file contains all necessary dependencies: actix-web, clap and
env_logger.
src/main.rs
Cargo.toml
To get started with containerizing, create a new Dockerfile in your project directory:
touch Dockerfile
This Dockerfile will contain all necessary commands to build your Docker image. The most important commands in a Dockerfile are the following:
FROMcreates a new stage from an existing Docker imageRUNexecutes a Linux command in the imageCOPYcopies files or folders from the local file system into the imageCMDorENTRYPOINTis executed when the image is instantiated as container
Again, it is important to remember the difference between images (build time) and container (runtime). The commands
FROM, RUN, and COPY are executed at build time. The commands CMD or ENTRYPOINT are
executed at runtime.
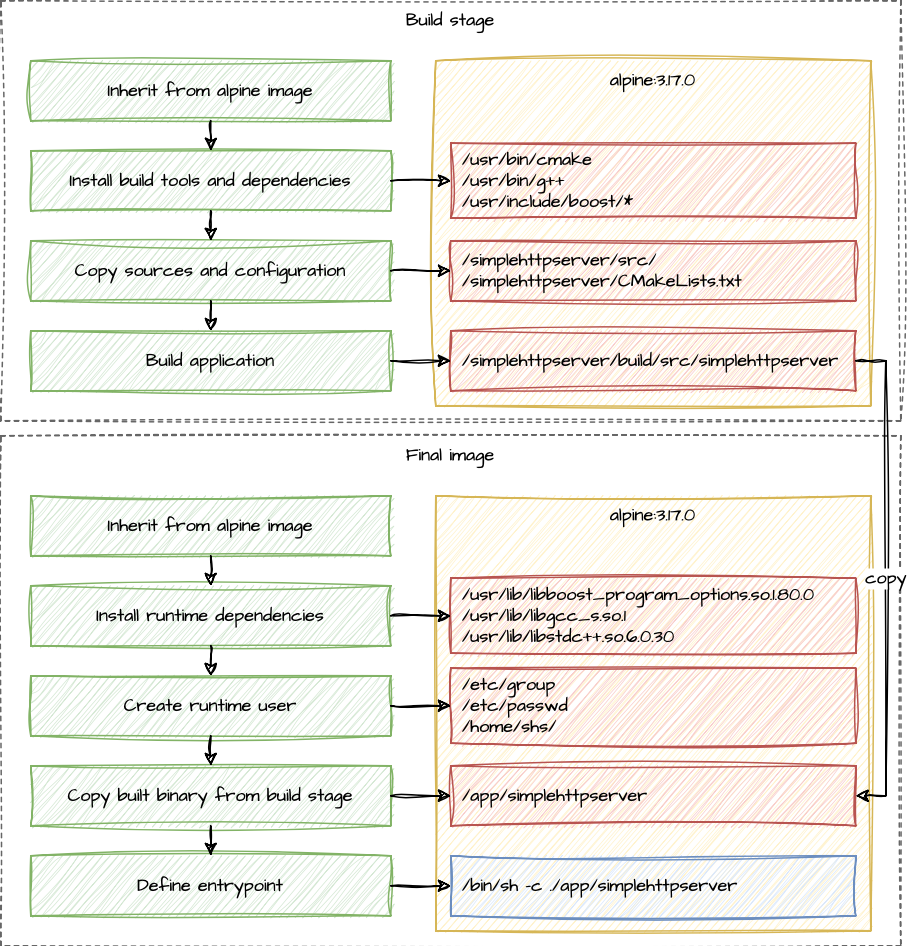
We are using a multi-stage build for our image. Multi-stage
builds are best practice if you are building an application in the container. We are planning on having a build stage
where we install build tools and dependencies, copy the required source files into the image and run Rust’s cargo
to build the application binary. In the second stage, which builds the final image, we are installing the
runtime dependencies and create a runtime user. After this, we just copy the built binary into the final image and
define the entrypoint which starts the application.

The Build Stage
The FROM command specifies the image to build upon. In this case, we are using the official Rust slim image. It is
best practice to specify the exact version of the image (in this case 1.77). The following keyword AS specifies
the name of the stage, in our case build.
FROM rust:1.77.0-slim as build
Then we need to add the build dependencies. Since we will build the final actual image from scratch to save on space,
we have to add muslhere to statically link our binary, because the default glibc is not available in scratch. The
full explanation on how to achieve a build from scratch came from
this blog post.
RUN rustup target add x86_64-unknown-linux-musl && \
    apt update && \
    apt install -y musl-tools musl-dev && \
    update-ca-certificates
The next commands copy the source files required to build our sample iowa application.
COPY ./src ./src
COPY ./Cargo.lock .
COPY ./Cargo.toml .
Afterwards we need to create the user we will be using for running the application already in the build stage - since we
do not have the adduser program in the scratch stage.
RUN adduser \
    --disabled-password \
    --gecos "" \
    --home "/nonexistent" \
    --shell "/sbin/nologin" \
    --no-create-home \
    --uid 10001 \
    "iowa"
From here we just need to run the cargo build command - remember to pass the --release flag to build a release
version of the application and the --target flag to specify to use x86_64-unknown-linux-musl. The cargo build tool
will create a target directory for all the intermediate build artifacts and the final compiled executable binary.
RUN cargo build --target x86_64-unknown-linux-musl --release
The Final Image
For the final image we are declaring this stage with another FROMstatement again. For this stage we are using a
rust:alpine Docker image, because we do not need the build tools from the Docker image used for the build stage.
FROM rust:1.77-alpine3.18
As next step we copy the necessary files for the user for running the application that we created already in the build
stage (remember that we do not have adduser available here). Additionally, we tell Docker with the USER command to
actually use the created user.
COPY --from=build /etc/passwd /etc/passwd
COPY --from=build /etc/group /etc/group

USER iowa:iowa
After this we are copying the built application binary from the build stage to our final image. The --chown
option specifies the ownership and the --from option the name of the stage where to copy from (in our case the
previous build stage).
COPY --from=build --chown=iowa:iowa ./target/x86_64-unknown-linux-musl/release/iowa /app/iowa
The last command is the starting point that is executed at runtime when the container is instantiated from this image. This allows any command line arguments to be passed, too.
ENTRYPOINT ["./app/iowa"]
You can find the full Dockerfile in my GitHub repo.
Building The Docker Image
The Docker image can be built by executing the following command in the project directory. The option -t is used
to specify the repository, name and optionally the tag of the image, according to the schema
<repository>/<name>:<tag>. If you do not declare a tag after the colon, Docker will use the tag latest. The
following command builds the image mostsignificant/iowa:latest which can be used later to specify to
instantiate a container.
docker build . -t mostsignificant/iowa
During the build you can see the different stages and layers being built. Each command in the Dockerfile adds a new layer. Thus it is important to have a multi-stage build to have only the built binary and the run-time dependencies in it. After building, run the following command to list all your local images with their information.
docker image ls
REPOSITORY             TAG      IMAGE ID       CREATED       SIZE
mostsignificant/iowa   latest   83a2870a14b1   2 hours ago   10.6MB
10.6 MB is a good size for this image - if we had used debian:bookworm-slim as base for this image, the resulting size would have been a whopping 86.6 MB. Reducing an image’s size can be a daunting task, but there are tools to support this task, for example dive which helps inspect the different layers of an image. Be aware that files added in earlier layers during the build process can be deleted in a later layer - but the original data is still in the resulting image. Therefore you can:
- use multi-stage builds and copy only the needed files from earlier stages to your final image
- or use remote repositories to install from instead of copying install packages into the image
- or download, unpack, install and remove packages in a single
RUNcommand
Running The Docker Image As Container
The following command runs the image and instantiates a container:
docker run \
  -p 1984:1984 \
  -d \
  mostsignificant/iowa:latest
We are using the following command line arguments:
-pmaps a port from inside the container to the host: the iowa’s default port 1984 is mapped to the same port on the host system, but you can use any other available port-dstarts the container in detached mode
The running Docker containers can also be inspected:
docker ps
CONTAINER ID   IMAGE                                     COMMAND                  CREATED         STATUS         PORTS                    NAMES
49021e2099d7   mostsignificant/iowa:latest   "./app/iowa"   3 seconds ago   Up 2 seconds   0.0.0.0:1984->1984/tcp   sad_visvesvaraya
The container names are randomly generated if not specified otherwise - in our case sad_visvesvaraya (read more about him on wikipedia). You can use the container id (hash) or name to reference it, for example:
docker stop 49021e2099d7to stop the container (and its processes)docker rm 49021e2099d7to remove the stopped container (but not the image!)docker inspect 49021e2099d7to get more information about the container
Publishing The Docker Image
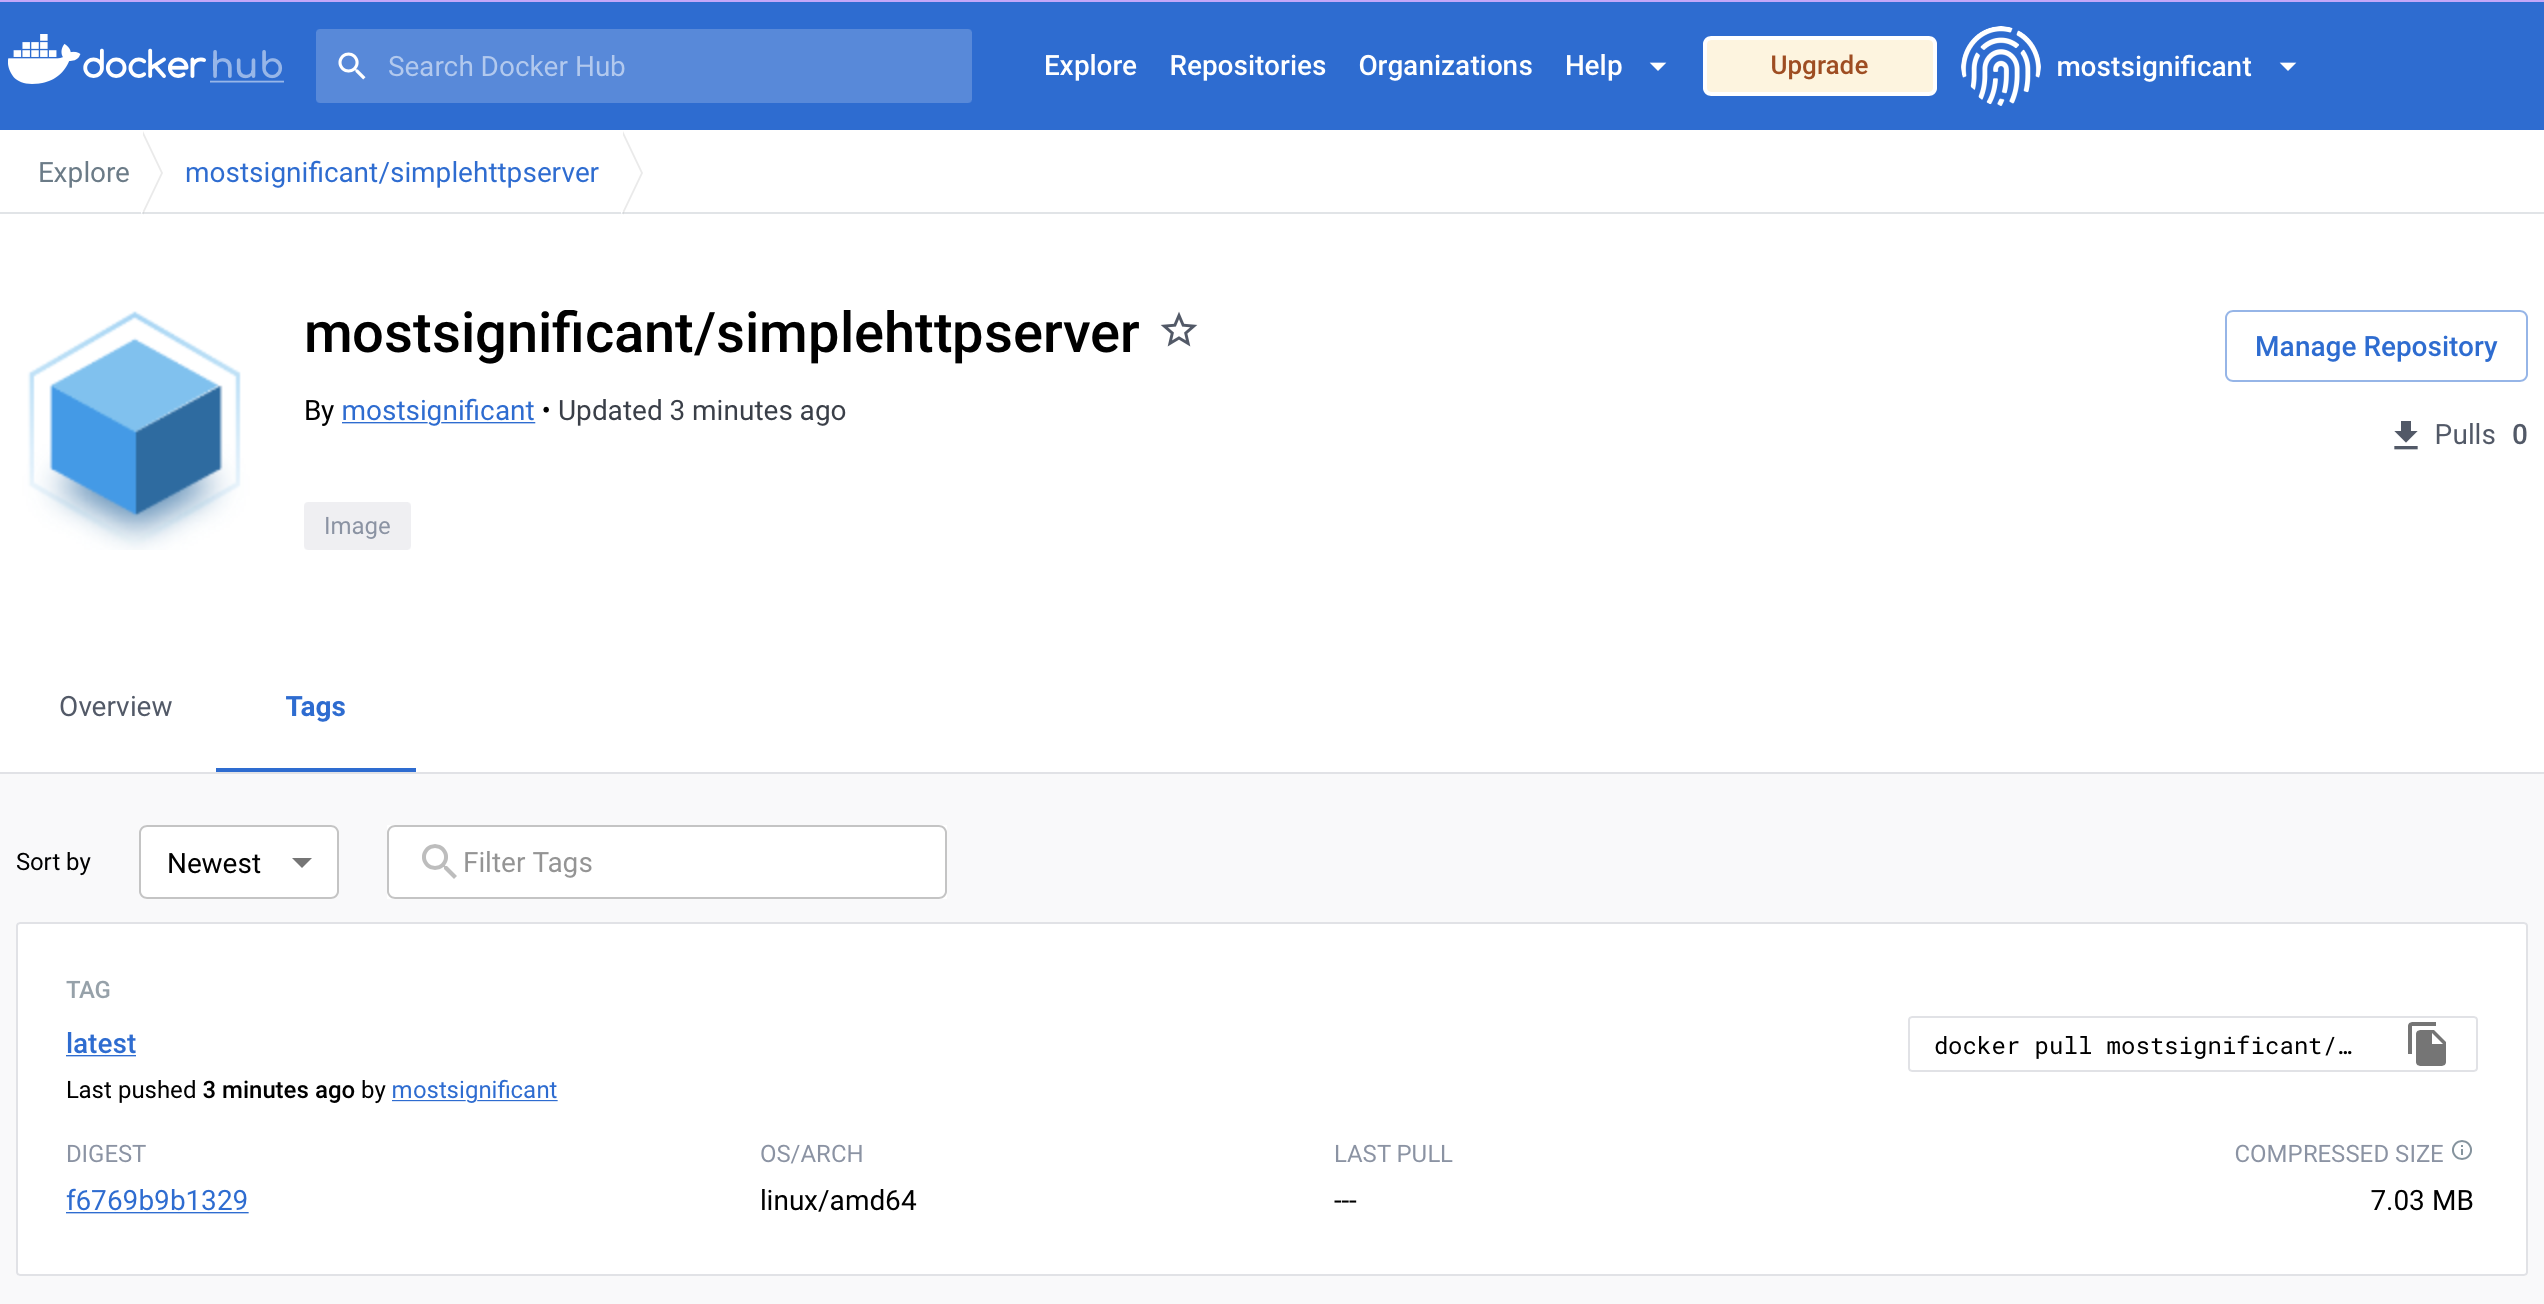
In order to publish your docker image, you need to create an account at the Docker Hub first. Be
aware that your account name needs to be the repository name you used earlier (or you just rename the image). In my case
my account name is mostsignificant, thus I name the images accordingly: _mostsignificant/
After you create your account, you must login to Docker Hub via the following command and provide credentials:
docker login
After logging in, the image can be pushed to the Docker Hub.
docker push mostsignificant/iowa:latest
And that’s it. Now anybody can download and run your Docker image.

Next Steps
Now you got your first Docker image with your application running. As always, there are some TLC steps to improve your image and everything around it. Here are some suggestions:
- Build pipeline: You can integrate the Docker build and push step into your build pipeline. If you are using GitHub Actions there is an excellent documentation on how to do it: either to GitHub’s own repository called GitHub Packages or Docker Hub.
- Testing: You can also include a test step in you build stage (for example via CTest). Just include the test in a way that the Docker image build does not fail if the tests fail - this way you can copy your test results file out of the image and pass it to your build pipeline. Than the build pipeline can prevent the publishing of the image if previous tests failed.
- Linting: You can use a Docker linter like hadolint to check your Dockerfile for common best practice violations.
- Documentation: Use labels to improve the documentation of your Dockerfile and add a README about your image to your site on Docker Hub.
- .dockerignore: Add a .dockerignore file to
your project directory to prevent docker builds to copy unwanted files or folders into your image (and be careful with
the
COPYcommand in general)
Conclusion
I hope this little tutorial helped any Rust developer not familiar with Docker to get started containerizing their applications. The full example can be found on my GitHub repo and the built image on my Docker Hub repo. There is a lot more to learn about the Docker world, and the official documentation and reference is a good start.
Keep on coding and keep on creating!
